Blank walls often feel intimidating. You stare at a massive empty space and wonder how to fill it without spending a fortune on one giant painting. You want your home to reflect your personality and showcase your favorite memories.
A curated collection of art offers the perfect solution to this design problem. You can combine family photographs, thrifted landscapes, and modern prints into one cohesive display. This approach brings immediate character and warmth to any room.
Many people abandon their picture wall ideas because they fear making permanent mistakes. They worry about putting unnecessary holes in their drywall. They feel overwhelmed by the sheer number of layout options and frame styles available.
You do not need an interior design degree to master this project. You simply need a clear strategy and a few basic tools. We will show you exactly how to do a gallery wall from start to finish.
What Is A Gallery Wall
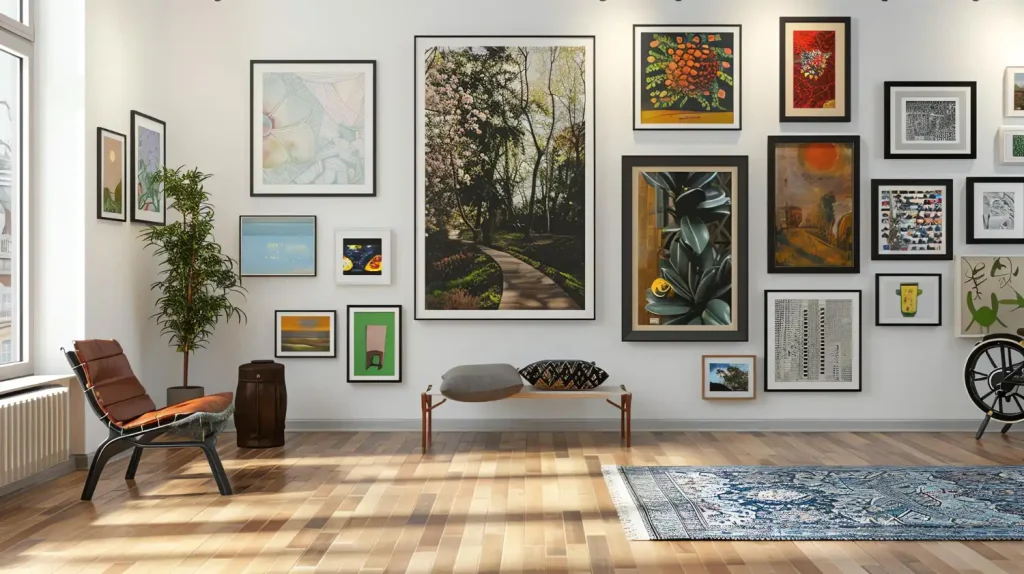
A gallery wall represents a curated collection of framed artwork, photographs, and personal objects displayed together. You arrange these items in a deliberate pattern to create a single large focal point. This technique allows you to display multiple smaller pieces instead of relying on one massive artwork.
Designers use gallery walls to tell a visual story about the homeowner. You can include items that hold deep sentimental value alongside purely aesthetic pieces. This combination creates a rich, textured look that feels uniquely yours.
You find these displays in almost every interior design magazine. They offer incredible versatility for renters and homeowners alike. You can easily swap out individual prints as your taste evolves over time.
How To Plan A Gallery Wall Like A Professional
Great execution requires excellent preparation. You must resist the urge to grab a hammer and start driving nails into your drywall immediately. You need to gather your materials and establish a clear vision first.
Begin by defining the overall mood you want to achieve. Look for gallery wall inspo online and save your favorite examples. You will quickly notice patterns in the styles and colors that attract your eye.
Gather all your potential art pieces in one room. You should collect more items than you actually plan to hang. This surplus gives you options when you start playing with different configurations.
Consider the existing color palette of your room. Your art should complement your furniture and wall color. You can choose a monochromatic theme or introduce bold contrasting colors for maximum impact.
Explore Top Gallery Wall Layout Ideas
Your chosen layout dictates the entire feeling of your display. You must match your arrangement style to your personal aesthetic and the architecture of your home. We highlight two primary approaches that guarantee beautiful results.
The Eclectic Gallery Wall
An eclectic gallery wall embraces a collected, organic appearance. You mix different frame styles, sizes, and colors in a freeform arrangement. This layout looks like it evolved naturally over many years.
You build this style organically around one or two large anchor pieces. You place these large items off-center to create dynamic visual tension. You then fill the surrounding gaps with medium and small pieces.
This approach forgives minor measurement errors easily. You do not need perfect symmetry to make it work. It represents the best option for beginners who want a relaxed, bohemian atmosphere.
The Symmetrical Grid Layout
A grid layout offers a sharp, modern alternative to the eclectic approach. You use identical frames and arrange them in perfect rows and columns. This style requires precise measurements and incredible patience.
You often see this technique used for black and white photography or botanical prints. The matching frames create a windowpane effect that feels incredibly sophisticated. It brings order and calm to busy spaces.
You must use a laser level to achieve this look. Even a fraction of an inch of misalignment ruins the entire effect. You should choose this layout if you prefer clean lines and minimalist aesthetics.
How To Create A Gallery Wall With Mixed Media
You elevate your design instantly when you move beyond standard flat prints. A mixed media gallery wall incorporates three-dimensional objects alongside traditional framed art. This adds unexpected depth and shadow to your arrangement.
You can hang almost anything that brings you joy. Think beyond standard paper and canvas. You want your guests to step closer and examine the unique details.
- Mount vintage mirrors to reflect light around the room.
- Hang sculptural ceramic pieces or woven wall baskets.
- Incorporate wooden typography or meaningful metal signs.
- Frame unusual objects like antique keys or theater tickets.
These dimensional elements break up the flat visual plane of glass and frames. They add crucial texture to your design. You make your home feel much more personalized and curated.
Designing A Gallery Wall Living Room Focal Point
The living room serves as the natural home for your largest art display. You typically hang this arrangement directly above your main sofa. You must follow specific scaling rules to make this relationship work.
Your arrangement should span roughly two-thirds the width of the furniture below it. A tiny cluster of frames over a massive sectional sofa looks completely lost. You must scale your collection to match the visual weight of your furniture.
Leave at least six to eight inches of empty space between the top of your sofa and the bottom of your lowest frame. This prevents your guests from bumping their heads against your art. It also gives the arrangement room to breathe.
How To Do A Gallery Wall Step By Step
You gathered your art and selected your layout style. You now need a foolproof method to transfer your vision to the wall. This exact process prevents extra nail holes and immense frustration.
Test Your Photo Wall Ideas On The Floor
Clear a large space on your floor directly below your intended wall. Use painter tape to mark out the exact dimensions of your available wall space. You will build your arrangement inside this taped boundary.
Start by placing your largest anchor piece slightly off-center. Arrange your medium pieces around the anchor. Fill the remaining spaces with your smallest frames and mixed media objects.
Take a photo of your layout with your phone. Rearrange the pieces and take another photo. Compare the photos side by side until you find the perfect balance of color and visual weight.
Create A Paper Gallery Wall Template
You should never skip the paper template phase. Trace every single frame onto kraft paper or old newspapers. Cut out each paper rectangle carefully.
Write a brief description of the art piece directly on the paper cutout. Note where the hanging wire or hook sits on the back of the actual frame. You will use these marks to find your exact nail placement later.
Use painter tape to stick these paper templates onto your wall. Stand back and evaluate the arrangement from different angles in the room. You can easily move the paper pieces around until the layout feels perfectly balanced.
Master The Spacing Rules
Consistent spacing separates amateur displays from professional installations. You need appropriate breathing room between your frames. Items packed too tightly look cluttered.
Aim for exactly two to three inches of space between every single frame in an eclectic layout. You must maintain this measurement consistently across the entire arrangement. This uniform negative space ties different frame styles together.
Use a standard roll of painter tape as a quick measuring tool. Most rolls are exactly two inches wide. You simply place the tape between frames to check your distances quickly.
How To Hang A Gallery Wall Perfectly
Leave the paper templates taped to the wall. You will drive your nails directly through the paper. This technique guarantees perfect placement every single time.
Find the mark you made on the paper indicating the hardware location. Hammer your picture hook or nail straight through that mark. Ensure the nail is secure in the drywall or stud.
Tear the paper template away from the wall carefully. Hang your framed art on the waiting nail. Use a small spirit level on top of the frame to ensure it sits perfectly straight.
Essential Gallery Wall Tips For Beginners
You will encounter small challenges as you build your collection. Professional designers use several tricks to make the process smoother. Keep these advanced gallery wall tips in mind as you work.
Always establish a central focal point at eye level. Most museums hang art so the center of the piece sits fifty-seven inches from the floor. You should use this measurement as the center line for your entire arrangement.
Mix horizontal and vertical orientations. An arrangement consisting entirely of vertical frames feels rigid and unnatural. You need both orientations to guide the eye comfortably across the display.
Vary your frame thicknesses and materials. You can mix sleek metal frames with chunky vintage wood. This variety creates the curated look you want.
Solving Common Photo Gallery Wall Problems
Many people struggle with color balance in large displays. You might find that one side of your arrangement feels much heavier than the other. This usually happens when you group all your dark frames or brightly colored art in one corner.
You must distribute visual weight evenly across the entire wall. If you have a large piece with heavy black tones on the left, you need a dark element on the right to balance it. You treat color and contrast exactly like physical weight on a scale.
Consider the lighting in your room carefully. Glass frames reflect light from nearby windows and lamps. You might need to use non-glare glass or adjust your track lighting to make your art visible from every angle.
How To Update Your Gallery Walls Over Time
Your art collection should never feel static or permanently finished. The best gallery walls evolve as your life changes. You should build flexibility into your initial design.
Use standard frame sizes whenever possible. You can easily open a standard frame and swap an old poster for a new family photograph. You keep the overall gallery wall layout intact while completely refreshing the content.
Leave room at the outer edges of your arrangement for future expansion. You will undoubtedly find new pieces you love on your travels. A good design allows you to add new items without disturbing the core layout.
Building an impressive art display takes time and patience. You start with a simple plan and execute it methodically. You soon realize that learning how to create a gallery wall produces immense satisfaction.
Enjoy the process of curating your personal museum. You will transform a boring blank space into the most interesting feature of your home. You simply need to gather your favorite pieces and start planning your gallery wall layout ideas today.